Welcome to the vibrant world of iPad screen recording, where the ordinary transforms into the extraordinary with just a few taps. In this digital age, our iPads serve as portals to creativity, entertainment, and productivity. Yet, how often have you asked, “Can you screen record on iPad?” Fear not, for Apple has gifted us a built-in solution – the screen recording feature.
Imagine a scenario where you want to showcase your gaming prowess, capture a crucial moment in a video, or document a tutorial for a friend. The iPad’s screen recording feature steps onto the stage as your virtual assistant, ready to record the spectacle unfolding on your screen. This article is your guide, your companion, and your key to unlocking the full potential of iPad screen recording.
Join us on this journey as we navigate the avenues of iPad creativity, starting with the foundational question: How does one harness the innate power of screen recording on an iPad? Strap in as we embark on an exploration of seamless recording, audio integration, and expert tips to make your iPad screen recording experience truly exceptional. Get ready to turn your iPad into a canvas of boundless possibilities.
Can You Screen Record On iPad?
Yes, you can indeed! Apple, in its user-centric approach, has equipped every iPad with a nifty built-in screen recording feature. No need for third-party apps or complex installations—your iPad comes prepared to capture the magic happening on its screen effortlessly.
This feature is a game-changer, allowing you to go beyond the static confines of screenshots and venture into dynamic realms. Whether you’re a tech enthusiast, a casual user, or a creative professional, the built-in screen recording on iPad opens a plethora of possibilities. From demonstrating app functionalities to sharing your gaming triumphs, the iPad’s built-in screen recording is your digital storytelling companion.
To access this feature, all you need is a brief visit to the Control Centre settings. With a few taps, you can add the screen recording shortcut, bringing this powerful tool within arm’s reach. It’s like having a virtual camera crew at your disposal, ready to capture and document your digital endeavors seamlessly.
So, whether you’re a seasoned iPad user or just getting acquainted with the functionalities, rejoice in the simplicity of the built-in screen recording feature. The power to record, share, and create is now at your fingertips, making your iPad more than just a device; it’s your personal canvas for digital expression.
Setting the Stage: Adding Screen Recording to Control Centre
Now that you’re eager to dive into the world of iPad screen recording, let’s set the stage by making sure the screen recording feature is easily accessible. This involves a quick pitstop in the Control Centre settings to add the screen recording shortcut.
- Open Settings on Your iPad: Begin your journey by launching the Settings app on your iPad. It’s the gear-shaped icon that holds the key to unlocking various functionalities.
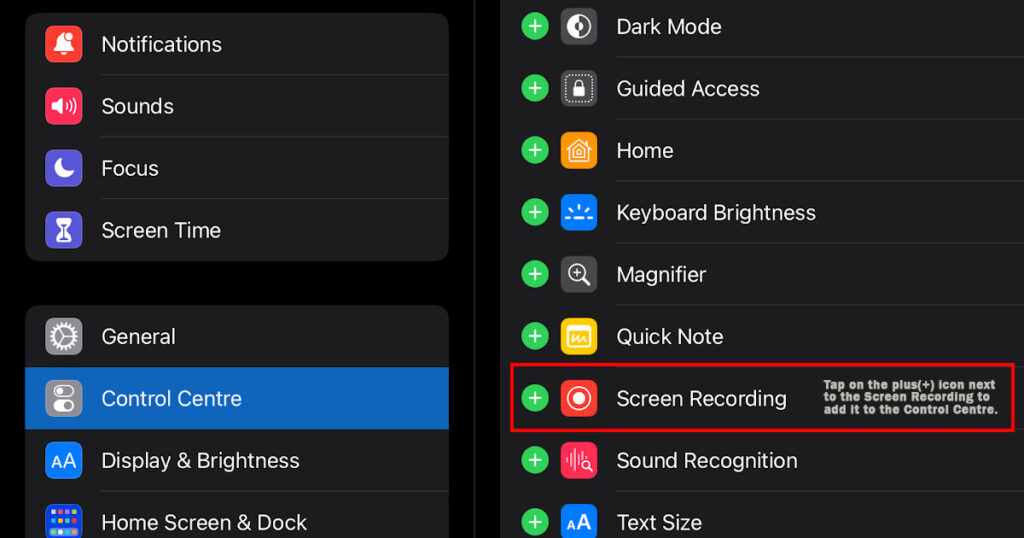
- Navigate to Control Centre: Scroll down in the Settings menu until you find “Control Centre” nestled just below “General.” Tap on it to enter the realm of customization.
- Add Screen Recording to Control Centre with a Simple Tap: In the “More Controls” section, you’ll discover a list of features that can be added to the Control Centre. Among them, seek out “Screen Recording.” A mere tap on the green plus (+) icon next to “Screen Recording” will add this functionality to your Control Centre.
With this quick maneuver, you’ve successfully primed your iPad for seamless screen recording. The shortcut is now part of your Control Centre, poised for action whenever you decide to capture the magic on your screen. This simple addition enhances the accessibility of the screen recording feature, ensuring that your iPad is always ready to transform into a digital recording studio at your command.
Initiating Screen Recording
Now that you’ve laid the groundwork by adding the screen recording shortcut to your Control Centre, it’s time to delve into the exhilarating process of initiating screen recording on your iPad. Here’s a step-by-step guide to kickstart your recording journey:
- Access Control Centre: Swipe down from the top-right corner of your iPad screen to reveal the Control Centre. This is where the magic begins.
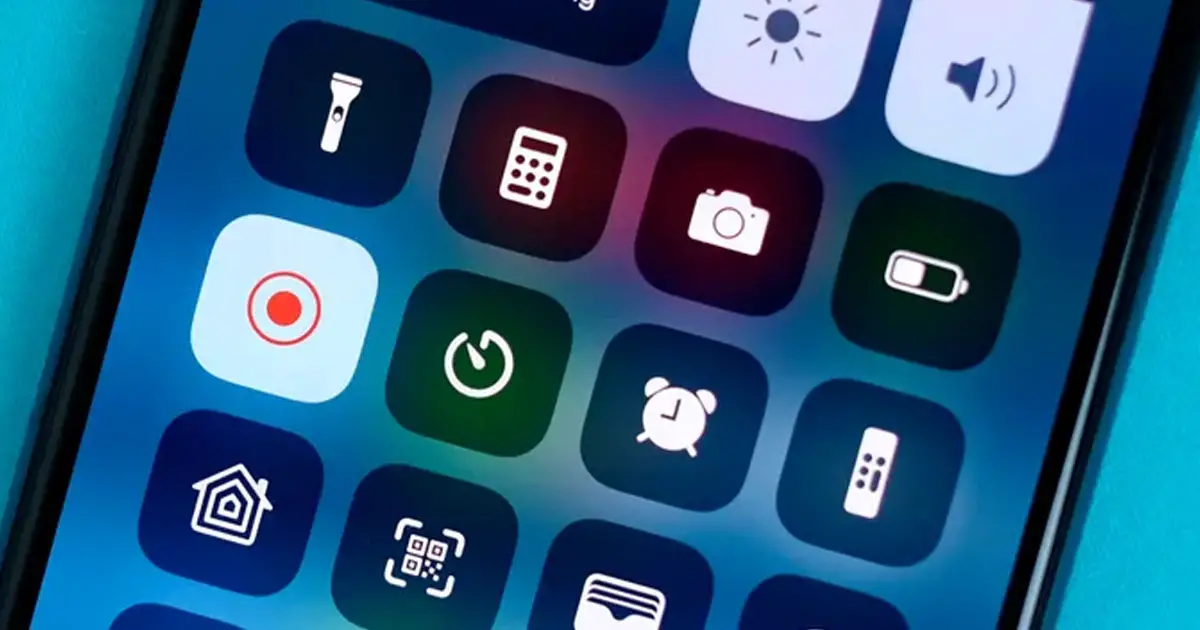
- Tap on the Screen Recording Shortcut: Among the array of icons in the Control Centre, locate the “Screen Recording” icon—a small circle surrounded by a ring. A single tap on this icon will set the wheels in motion.
- Observe the Three-Second Countdown: After tapping the screen recording shortcut, brace yourself for a brief three-second countdown. This countdown gives you a moment to prepare and ensures that your recording captures exactly what you want.
- Confirmation: A Red Signal Indicates the Commencement of Screen Recording: As soon as the countdown concludes, a red recording signal will appear in the top-right corner of your iPad screen. This indicates that your screen recording has officially begun, and the iPad is now capturing the live action on your display.
With these simple steps, you’ve unleashed the power of screen recording on your iPad. Whether you’re demonstrating a new app feature, sharing your gaming prowess, or creating a tutorial, the built-in screen recording feature is now at your disposal, ready to document your digital endeavors with precision and ease.
Recording Audio Alongside Screen Capture
While the initial steps get you started with screen recording, enhancing your content often involves incorporating audio commentary. By default, the screen recording feature captures video only, leaving out any accompanying sounds. Fear not; you can easily remedy this by following these steps:
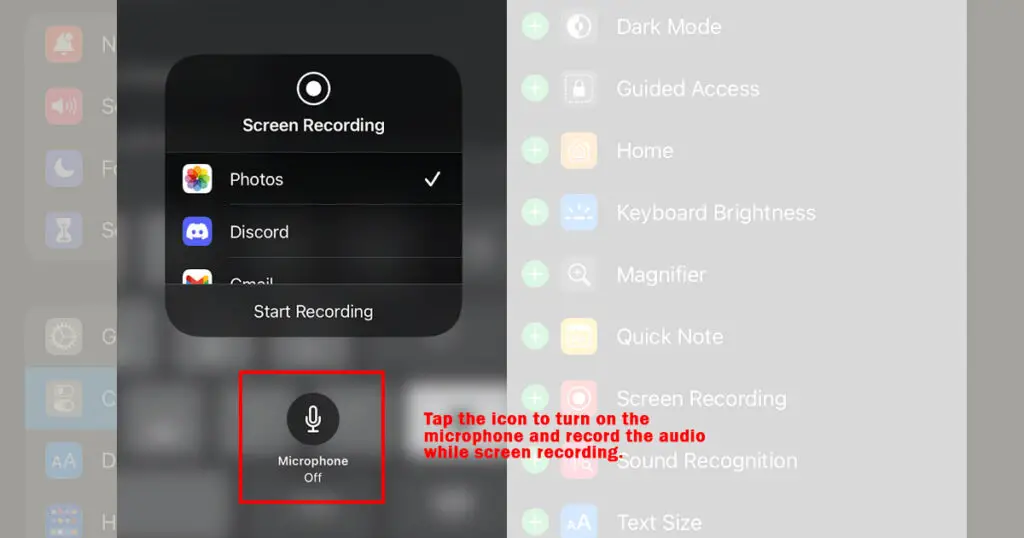
- Press and Hold the Screen Recording Shortcut: To delve into audio recording, press and hold the screen recording shortcut in the Control Centre. This action will unveil additional options, including the ability to toggle the microphone.
- Enable Microphone: A pop-up with a “Microphone Off” icon will appear. Tap this icon to activate the microphone, allowing your iPad to record not only visuals but also the accompanying sounds, be it your voice or any other audio playing on the device.
By enabling the microphone during screen recording, you elevate your content to a new level. Whether you’re providing commentary, narrating a tutorial, or simply adding context to your screen capture, the inclusion of audio enhances the viewer’s experience and ensures that your message is conveyed with clarity. So, speak up, let your voice be heard, and infuse your screen recordings with a dynamic audio dimension.
Stopping the Screen Recording
Just as easily as you initiate the screen recording on your iPad, stopping the recording is a straightforward process. Here’s how you can wrap up your recording session:
- Locate the Screen Recorder’s Red Signal: During your screen recording session, a red signal appears in the top-right corner of your iPad screen. When your recording is complete and you’re ready to stop, this signal becomes your exit ticket.
- Tap on the Screen Recorder’s Red Signal: Give a gentle tap to the red recording signal. This action will prompt a small box to appear with two options: “Cancel” and “Stop.”
- Choose “Stop” to Halt the Recording: To bring your screen recording to a close, select the “Stop” option. This instructs your iPad to conclude the recording, finalizing the captured footage.

With these simple steps, you’ve successfully halted the screen recording, and your iPad has generated a recording file ready for review and sharing. This seamless process ensures that you have complete control over when and how long you capture your screen, providing you with a hassle-free experience from start to finish.
Pro Tips for Seamless Screen Recording
As you continue to explore the realms of screen recording on your iPad, here are some pro tips to elevate your recording game:
1. Activate Do Not Disturb
To prevent interruptions during your recording, consider activating the Do Not Disturb feature from the Control Centre. This ensures that incoming notifications won’t disrupt your seamless recording session.
2. Explore Editing in Photos
Once your screen recording is saved in the Photos app, don’t forget to explore the built-in editing features. Trim, crop, and add filters to refine your recording and tailor it to your specific needs.
3. Ensure Sufficient Storage
Although there’s no specific time limitation for screen recording, it’s essential to have enough storage space on your iPad. Running out of storage mid-recording may lead to an automatic stop, so regularly check and manage your available storage.
4. Utilize the iPad’s Versatility
Experiment with various applications and scenarios for screen recording. Whether it’s showcasing app functionalities, creating engaging tutorials, or capturing memorable gaming moments, the iPad’s built-in screen recording is a versatile tool.
By incorporating these pro tips into your screen recording routine, you’ll not only streamline the process but also enhance the overall quality and impact of your recorded content. Embrace the creative possibilities that screen recording offers, and let your iPad become the canvas for your digital storytelling adventures.
Locating and Editing Your Screen Recordings
Now that your screen recording masterpiece is complete, the next steps involve finding and perfecting your creation. Let’s navigate through the process of locating and editing your screen recordings on the iPad:
- Visit the Photos App: After concluding your screen recording, head to the Photos app on your iPad. This is where all your multimedia content, including screen recordings, is neatly organized.
- Allow for Processing Time: Give your iPad a few moments to process and save the screen recording. The recording will seamlessly integrate into your Photos library.
- Explore Editing Options: Once in the Photos app, select your screen recording and dive into the editing options. Trim, cut, or enhance your recording using the built-in tools to refine and tailor it to your specifications.
- Utilize the Share Feature: After perfecting your screen recording, use the Share feature within the Photos app to distribute your creation. Share it directly with friends, family, or colleagues, or upload it to your preferred platform for a wider audience.
By effortlessly navigating the Photos app and utilizing the available editing tools, you not only locate your screen recordings with ease but also have the flexibility to enhance and customize them. This final stage ensures that your recorded content is ready for sharing, making it accessible to others and allowing your creativity to reach a broader audience.
Time Limitations and Storage Considerations
As you continue your screen recording endeavors on the iPad, it’s essential to be mindful of two crucial factors: time limitations and storage considerations. Let’s delve into these aspects to ensure a seamless recording experience:
- No Explicit Time Limitations: Unlike some platforms that impose strict time constraints on screen recordings, the iPad’s built-in screen recording feature offers flexibility. There’s no explicit time limit, allowing you to record for as long as your storage space permits.
- Storage Impact: The length of your screen recording is directly linked to the available storage on your iPad. While there’s no predefined maximum duration, it’s vital to monitor your storage levels. If your device approaches full capacity during recording, the process may automatically halt.
- Regularly Check Available Storage: To avoid unexpected interruptions, make it a habit to check your iPad’s available storage regularly. This proactive approach ensures that you have ample space for extended recording sessions without the risk of sudden stops.
By understanding these considerations, you empower yourself to make informed decisions about the duration of your screen recordings and maintain optimal storage conditions. This knowledge contributes to a smooth and uninterrupted recording experience, allowing you to capture moments and create content without constraints.
Conclusion
In the vast realm of digital expression, the iPad’s built-in screen recording feature stands out as a formidable tool, unlocking avenues for creativity, education, and content creation. As we draw the curtain on this exploration into iPad screen recording, it’s evident that this native feature eliminates the need for third-party apps, offering a seamless and versatile solution for capturing your device’s activity.
The user-friendly initiation, coupled with the ability to enhance recordings with audio commentary, makes the iPad a dynamic canvas for storytelling. Stopping and saving your recordings is a breeze, leaving you with a file ready for review and sharing. Pro tips provide insights into mastering the art of screen recording, ensuring uninterrupted sessions and optimal editing.
After the creative process, effortlessly locate, edit, and share your masterpiece, trimming and enhancing it in the Photos app. While there’s no explicit time limit, vigilance in monitoring storage ensures a smooth recording experience. Embrace the boundless possibilities of iPad screen recording, allowing your creativity to flourish and your unique perspective to captivate audiences. Whether you’re an artist, educator, or content creator, the iPad’s screen recording feature empowers you to narrate your digital story with flair, capturing, creating, and sharing in the vibrant landscape of possibilities.