
iPads have become an essential part of our lives. With time, Apple releases newer models of the iPad, which may make you feel that your old iPad is outdated. But did you know that you can update your old iPad to the latest software version and enjoy the new features? Updating your old iPad is easy, and in this guide, we will show you how to update an old iPad to the latest software version.
Check Compatibility
Before updating your old iPad, it’s essential to check its compatibility with the latest iOS version. Apple regularly releases new iOS updates with bug fixes, security enhancements, and new features. However, not all iPad models are capable of running the latest iOS version.
To check the compatibility of your iPad with the latest iOS version, follow these steps:
- Open the Settings app on your iPad.
- Tap on General.
- Tap on About.
- Look for the “Model” information and note down the model number.
- Go to the Apple website and check the latest iOS version compatible with your iPad model.
If your iPad is compatible with the latest iOS version, then you can proceed with the update process. However, if your iPad is incompatible, you may need to consider purchasing a new device to access the latest features and updates.
Back-Up Your iPad
Before updating your old iPad, it is crucial to back up all your important data to prevent any loss of data. Updating your iPad can sometimes lead to data loss or corruption, so it’s essential to have a backup of your data. There are several ways to back up your iPad, including using iCloud or iTunes.
Using iCloud:
- Connect your iPad to a Wi-Fi network.
- Go to Settings > [your name] > iCloud > iCloud Backup.
- Toggle on the iCloud Backup switch and tap on “Back Up Now.”
Using iTunes:
- Connect your iPad to your computer and open iTunes.
- Select your device when it appears in iTunes.
- Click on “Back Up Now” to start the backup process.
Backing up your iPad may take some time, depending on the amount of data you have on your device. Once you have backed up your data, you can proceed with the update process with peace of mind, knowing that your data is safe and secure.
It’s worth noting that even if you have iCloud backup turned on, it’s still a good idea to back up your iPad to your computer via iTunes. This will ensure that you have a second copy of your data in case anything goes wrong during the update process.
iPad Models and Compatible iPadOS Versions
| iPad Model | Release Year | Maximum iPadOS Version |
|---|---|---|
| iPad 1 | 2010 | iOS 5.1.1 |
| iPad 2 | 2011 | iOS 9.3.6 |
| iPad 3 | 2012 | iOS 9.3.6 |
| iPad 4 | 2012 | iOS 10.3.4 |
| iPad 5th generation | 2017 | iPadOS 14.7 |
| iPad 6th generation | 2018 | iPadOS 14.7 |
| iPad 7th generation | 2019 | iPadOS 14.7 |
| iPad 8th generation | 2020 | iPadOS 14.7 |
| iPad 9th generation | 2021 | iPadOS 15.1 |
| iPad Air | 2013 | iOS 12.4.9 |
| iPad Air 2 | 2014 | iOS 14.7.1 |
| iPad Air 3 | 2019 | iPadOS 14.7 |
| iPad Air 4 | 2020 | iPadOS 15.1 |
| iPad Pro 12.9-inch (1st generation) | 2015 | iOS 12.4.9 |
| iPad Pro 9.7-inch | 2016 | iOS 14.7.1 |
| iPad Pro 10.5-inch | 2017 | iPadOS 14.7 |
| iPad Pro 12.9-inch (2nd generation) | 2017 | iPadOS 14.7 |
| iPad Pro 11-inch (1st generation) | 2018 | iPadOS 14.7 |
| iPad Pro 12.9-inch (3rd generation) | 2018 | iPadOS 14.7 |
| iPad Pro 11-inch (2nd generation) | 2020 | iPadOS 15.1 |
| iPad Pro 12.9-inch (4th generation) | 2020 | iPadOS 15.1 |
| iPad Pro 11-inch (3rd generation) | 2021 | iPadOS 15.1 |
| iPad Pro 12.9-inch (5th generation) | 2021 | iPadOS 15.1 |
Note: This table is accurate as of the latest software releases as of April 30, 2023. However, it is always recommended to check for any updates from Apple for your specific device.
How to Update an Old iPad Wirelessly via Settings
Updating an old iPad can improve its performance and security, and provide access to new features and apps. One of the easiest ways to update your iPad is through the Settings app. Here’s how you can do it:
- Connect your iPad to a stable Wi-Fi network: Before you begin, make sure your iPad is connected to a Wi-Fi network with a stable internet connection. Updating your iPad over a cellular connection can use a lot of data and may also cause additional charges from your carrier.
- Check the battery level: Ensure that your iPad has enough battery level or keep it connected to a power source while updating. If your iPad battery level is low, it may take longer to update and could cause issues.
- Open Settings: Tap on the Settings app on your iPad’s home screen. It has an icon that looks like a gear.
- Tap on “General”: From the Settings menu, scroll down and tap on “General” to view general settings.
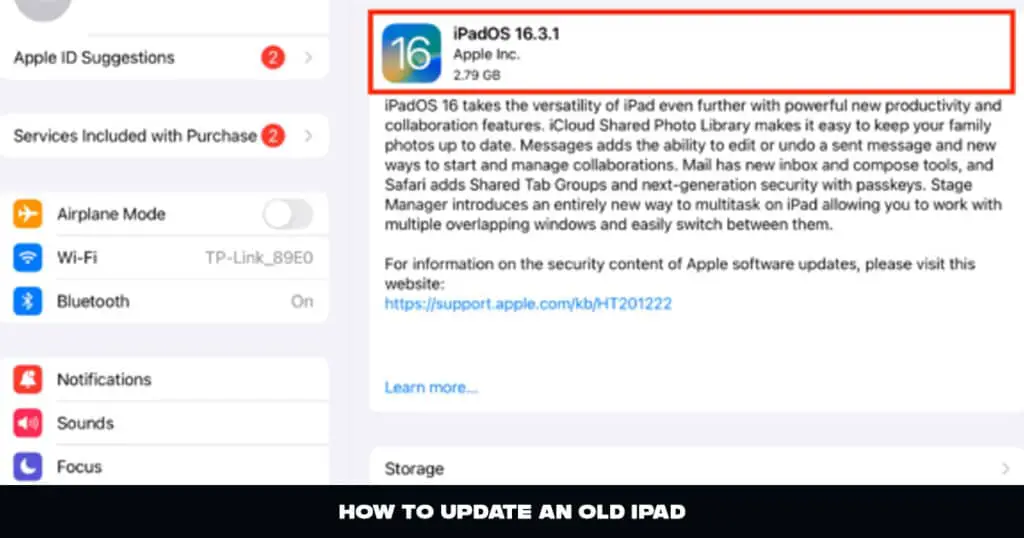
- Tap on “Software Update”: In the General settings menu, tap on “Software Update”.
- Check for updates: Your iPad will now check for available updates. If an update is available, tap “Download and Install”. If no update is available, your iPad is already up to date.
- Enter your passcode: You may be prompted to enter your passcode. If you have enabled Touch ID or Face ID, you may also need to authenticate with your fingerprint or face.
- Agree to the terms and conditions: Once the update is downloaded, you’ll need to agree to the terms and conditions before installation. Tap on “Agree” to continue.
- Install the update: Tap on “Install” to begin the update process. The installation process may take some time, depending on your iPad’s model and the size of the update.
- Restart your iPad: Once the installation is complete, your iPad will restart automatically. After the restart, your iPad will be updated to the latest version of iOS.
Updating your iPad via Settings is a straightforward process that can be done in a few simple steps. If you encounter any issues during the update process, you can try updating your iPad via iTunes or contacting Apple support for assistance.
Update iPad via iTunes
Updating an old iPad via iTunes is another method to consider. In this section, we will guide you through the process of updating your old iPad using iTunes.
- Connect your iPad to your computer using a USB cable.
- Launch iTunes on your computer. If your iTunes is not updated, update it to the latest version.
- Select your iPad from the device menu in iTunes.
- Click on the “Summary” tab in the sidebar.
- Click on the “Check for Update” button.
- iTunes will check for the latest iOS version available for your iPad.
- If an update is available, click on the “Download and Update” button.
- iTunes will start downloading the iOS update, which may take some time depending on your internet speed and the size of the update file.
- Once the download is complete, iTunes will begin installing the update on your iPad.
- Do not disconnect your iPad from your computer during the installation process.
- Once the installation is complete, your iPad will restart with the updated version of iOS.
Note: If you encounter any error messages during the update process, you can refer to the Apple support website for troubleshooting steps or seek assistance from an authorized Apple service provider.
Updating your old iPad using iTunes is a straightforward process that can be completed with ease. However, make sure to back up your iPad before proceeding with the update to avoid losing any data or information.
Also read: How Old is My iPad? 6 Best Methods to Find Out
Update iPad via Finder (for macOS Catalina or later)
Updating an old iPad can be a bit tricky, but thankfully, Apple provides several methods to get the job done. One of the most recent methods to update an iPad is via Finder, but this is only applicable for macOS Catalina or later.
Here’s how to update an old iPad via Finder:
- Connect your iPad to your Mac using a Lightning cable.
- Open Finder on your Mac.
- Click on your iPad in the sidebar of Finder.
- Click on the “General” tab in the iPad window.
- Click on the “Check for Update” button in the “Software Update” section.
- If an update is available, click on the “Download and Update” button.
- Follow the on-screen instructions to complete the update process.
It’s important to note that the process may take some time, depending on the size of the update and the speed of your internet connection. Additionally, it’s crucial to ensure that your Mac is running the latest version of macOS to ensure compatibility with your iPad.
Updating an old iPad is an essential step in keeping your device running smoothly and securely. Whether you choose to update via Settings, iTunes, or Finder, following these steps will help ensure that your iPad is up-to-date and ready to use.
Common Problems and Solutions
Updating an old iPad is a great way to ensure that your device is running smoothly and is compatible with the latest apps and features. However, sometimes the update process can present some problems that can be frustrating for users. In this section, we will discuss some common problems that can occur during the update process and their solutions.
1. Not Enough Storage Space
One of the most common problems that iPad users face when updating their devices is running out of storage space. Before updating your iPad, it is essential to check if you have enough space to download and install the update. If your iPad is running low on storage, you can free up some space by deleting unused apps, photos, and videos.
2. Slow Download Speed
Another common problem that can occur during the update process is slow download speed. This can be caused by a poor internet connection or a busy server. If you are experiencing slow download speed, you can try the following solutions:
- Connect your iPad to a faster Wi-Fi network or use a wired internet connection.
- Check if your internet connection is working correctly.
- Pause and resume the download to see if it improves the download speed.
- Wait for a few hours or try downloading the update at a different time when the server is less busy.
3. Update Failure
Sometimes, the update process can fail, and the iPad may get stuck on the Apple logo or the update screen. In this case, you can try the following solutions:
- Force restart your iPad by pressing and holding the Home button and the Sleep/Wake button until the Apple logo appears.
- If the force restart does not work, you can try putting your iPad in recovery mode and restoring it using iTunes or Finder.
- Ensure that you have a stable internet connection and that your iPad has enough battery life to complete the update.
4. Touch Screen Not Responding
After updating your iPad, you may encounter problems with the touch screen not responding correctly. This can be caused by software conflicts or compatibility issues. To fix this problem, you can try the following solutions:
- Restart your iPad.
- Check if the problem persists after disabling any third-party apps that may be causing conflicts.
- If the problem persists, you can try resetting your iPad to its factory settings.
In conclusion, updating an old iPad can be a simple and straightforward process if you follow the steps outlined in this guide. However, if you encounter any problems during the update process, the solutions discussed in this section can help you troubleshoot and fix the issues.
Conclusion
In conclusion, updating your old iPad to the latest operating system is a great way to breathe new life into your device and enjoy new features and enhancements. Before you begin the update process, it’s important to check your iPad’s compatibility with the latest OS version, back up your data, and choose the best update method for your needs. Whether you prefer to update via settings, iTunes, or Finder, following the steps we’ve outlined should help you successfully update your old iPad to iOS 14. By keeping your iPad up to date, you can continue to enjoy all the ways your device can enrich your life.